Exporting the model to a registry
After you trained a model, to run the model on the edge server and get inference results, the next step is to create the ‘solution artifacts’. You can use the Google Cloud Console for Visual Inspection AI service, or command-line scripts to create a solution artifact.
Note on model acceleration on the edge server: When you create the solution artifact, you can choose if the VIAI service compiles the model for x86 CPU, or NVIDIA GPU acceleration. If your server has a compatible GPU model, and runs only one VIAI model, you should export the model for GPU acceleration. If your server will run multiple VIAI models, or does not have a suitable GPU card, you can export the model for x86 CPU acceleration. Please refer to the section ‘Using multiple cameras’, with dedicated ML models triggered simultaneously for more information on how to compile ML models for CPU or GPU, and run multiple models on the same server simultaneously.
Option 1 - Exporting the VIAI ML model to Google Cloud Container Registry
If this is the first time you use this solution, it is recommended to use Google Cloud Console to create the solution artifacts. This will generate and store the model container image to Container Registry.
-
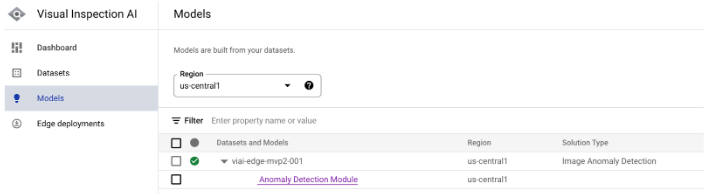
In the Google Cloud Console, go to Visual Inspection AI -> Models -> expand the model you trained in the previous sections.
-
Click the model type link (in the previous example it would be ‘Anomaly Detection Module’). This will take you to the evaluation page.
-
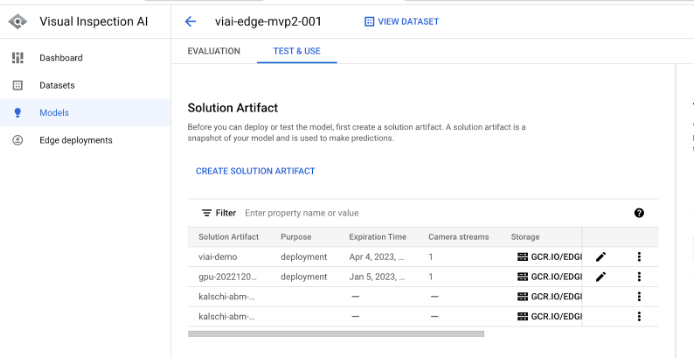
Under the ‘Test and Use’ tab, click ‘Create Solution Artifact’
-
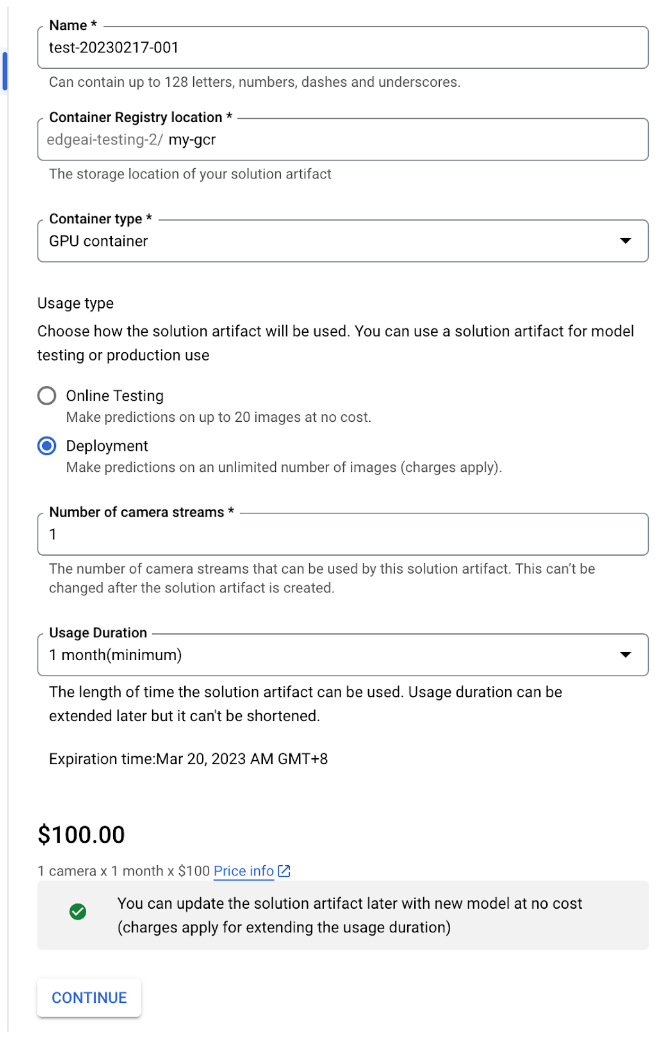
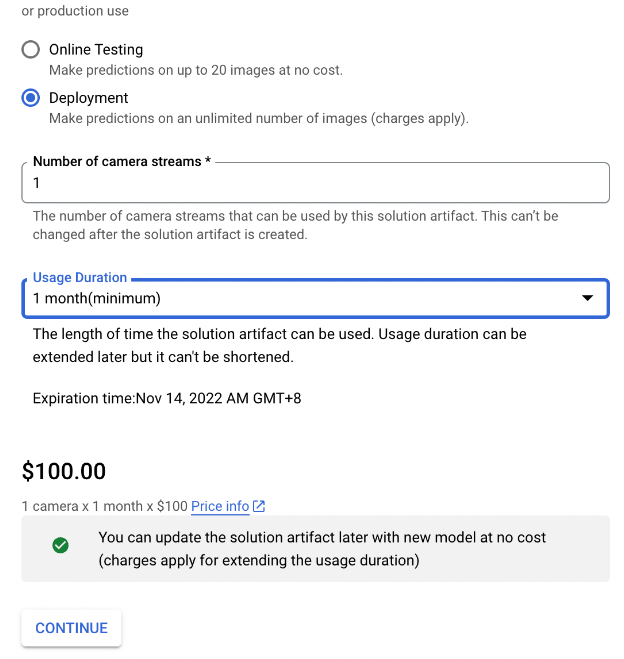
Fill in the required fields, click ‘Continue’, then confirm purchase.
-
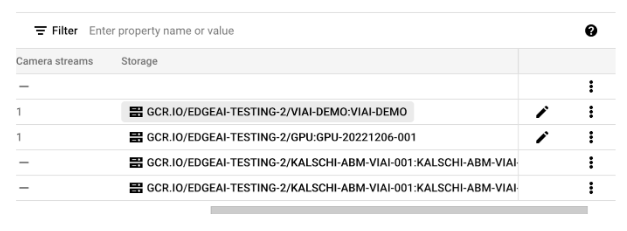
Once the model container has been generated, take note the container image URL
Option 2 - Exporting the VIAI ML model to Artifact Registry
To export a trained VIAI model container with GPU acceleration to Google Cloud Artifiact Registry, follow the next steps:
Run on Setup Workstation
-
In the Google Cloud Console, go to Visual Inspection AI -> Models -> expand the model you trained in the previous sections.
Take note of the part of the URL highlighted, and in the setup workstation (your Linux or macOS), set an environment variable with that value.
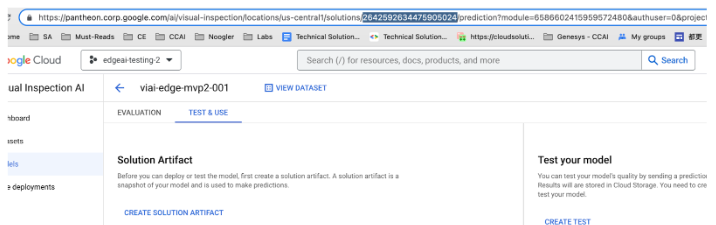
export SOLUTION_NUMBER=<your solution number> -
Generate a token and export it as an environment variable.
gcloud auth print-access-token export ACCESS_TOKEN=<your access token> -
Review the value of
DISPLAY_NAME,DEFAULT_PROJECTandDEFAULT_REGIONand prepare the rest of the environment variables.export DISPLAY_NAME=<your model name> export DEFAULT_PROJECT=<your gcp project> export DEFAULT_REGION=<your gcp region> export VIAI_REGION=us-central1 export PROJECT_NUMBER=$(gcloud projects list --filter="$DEFAULT_PROJECT" --format="value(PROJECT_NUMBER)") export ARTIFACT_REGISTRY_URL="${DEFAULT_REGION}-docker.pkg.dev/${DEFAULT_PROJECT}/viai-models/${DISPLAY_NAME}:gpu-20221014003" export SOLUTION_ARTIFACTS_URL=https://${VIAI_REGION}-visualinspection.googleapis.com/v1/projects/${PROJECT_NUMBER}/locations/${VIAI_REGION}/solutions/${SOLUTION_NUMBER}/solutionArtifacts -
Prepare the API call to upload the model to Artifact Registry.
Note that you will need to define an expiration time for the solution artifact. (Keep in mind that you might incur in additional charges, You can see an estimation on the Artifacts Registry pricing page).
This is done specifying an epoch value for
seconds, in the example below1668386001translates to Nov 14, 2022. Change that value as needed using a converter.cat <<EOF > /tmp/body.json {"display_name": "${DISPLAY_NAME}", "enable_aiplatform_model_upload": false, "export_type": "GPU_CONTAINER", "container_export_location": {"output_uri": "${ARTIFACT_REGISTRY_URL}"}, "expire_time": {"seconds": 1668386001}, "camera_count": 1, "purpose": "deployment"} EOF -
Run the API call
curl --location --request POST ${SOLUTION_ARTIFACTS_URL} \ --header "Authorization: Bearer ${ACCESS_TOKEN}" \ --header "Content-Type: application/json" \ --data "@/tmp/body.json" -
Verify that the container is accessible from Artifact Registry
 gcloud auth configure-docker europe-west4-docker.pkg.dev
 docker pull ${ARTIFACT_REGISTRY_URL}
 docker run \--rm --name "test_cpu" \-p 8601:8601 -p 8602:8602 -p 8603:8603 \-t ${IMAGE_TAG}
 curl localhost:8602/statusz
You should see output similar to this:
Container is valid until: 2022-11-04T00:20:25+00:00
Cost
Exporting the model in ‘Deployment’ mode means that you want to deploy this model to a production environment and start serving production images. This will incur service charges. In the Solutions Artifacts creation console you can see charges for different configurations.
At this point the ML has been exported. You can continue to the next section to deploy your ML model to the edge server