Schema modification features
When migrating a schema to Spanner, using the default conversion may be sub-optimal owing to functional differences in the features supported and different performance characteristics of Spanner. Following the best practices, it may be better to change keys, drop or add some indexes, or add/remove columns to existing tables in the Spanner schema.
Table of contents
Tables
Users can view detailed information for a table by selecting it from the Spanner Draft section. This includes details on columns, primary keys, foreign keys, interleave property, spanner DDL and the option to edit these along with deleting or restoring the table.
Column
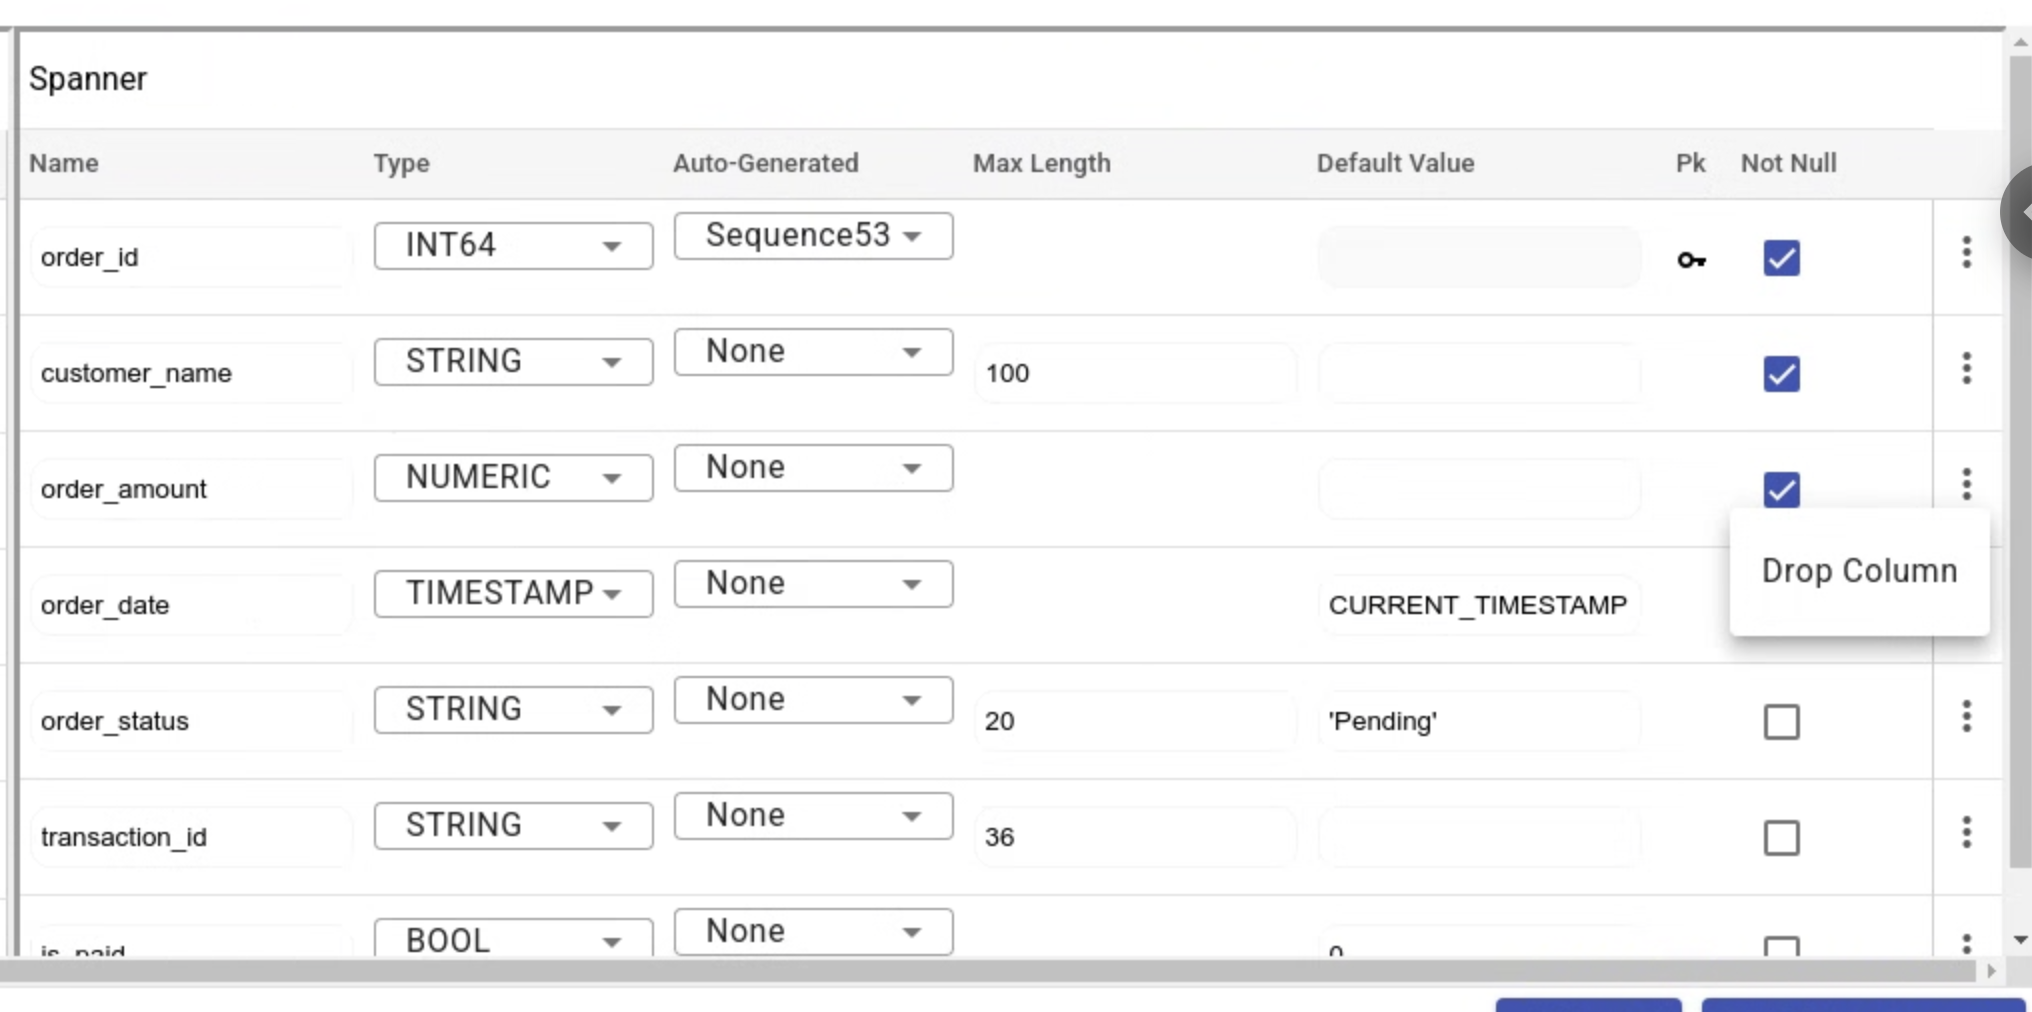
Column tab provides information on the columns that are a part of the selected table. It also provides the option to edit the column wherein a user can modify a column name, delete a column, change the data type of the column, add and configure auto-generation for the column, modify the default value or modify the null property of the column. Once the user is done with required modifications, they can click on **SAVE & CONVERT **and the update would reflect in the session file and across all the components in the database.
Add Column
In addition to editing the existing columns in the Spanner draft mapped from the source database, users can also add new columns to the selected table.
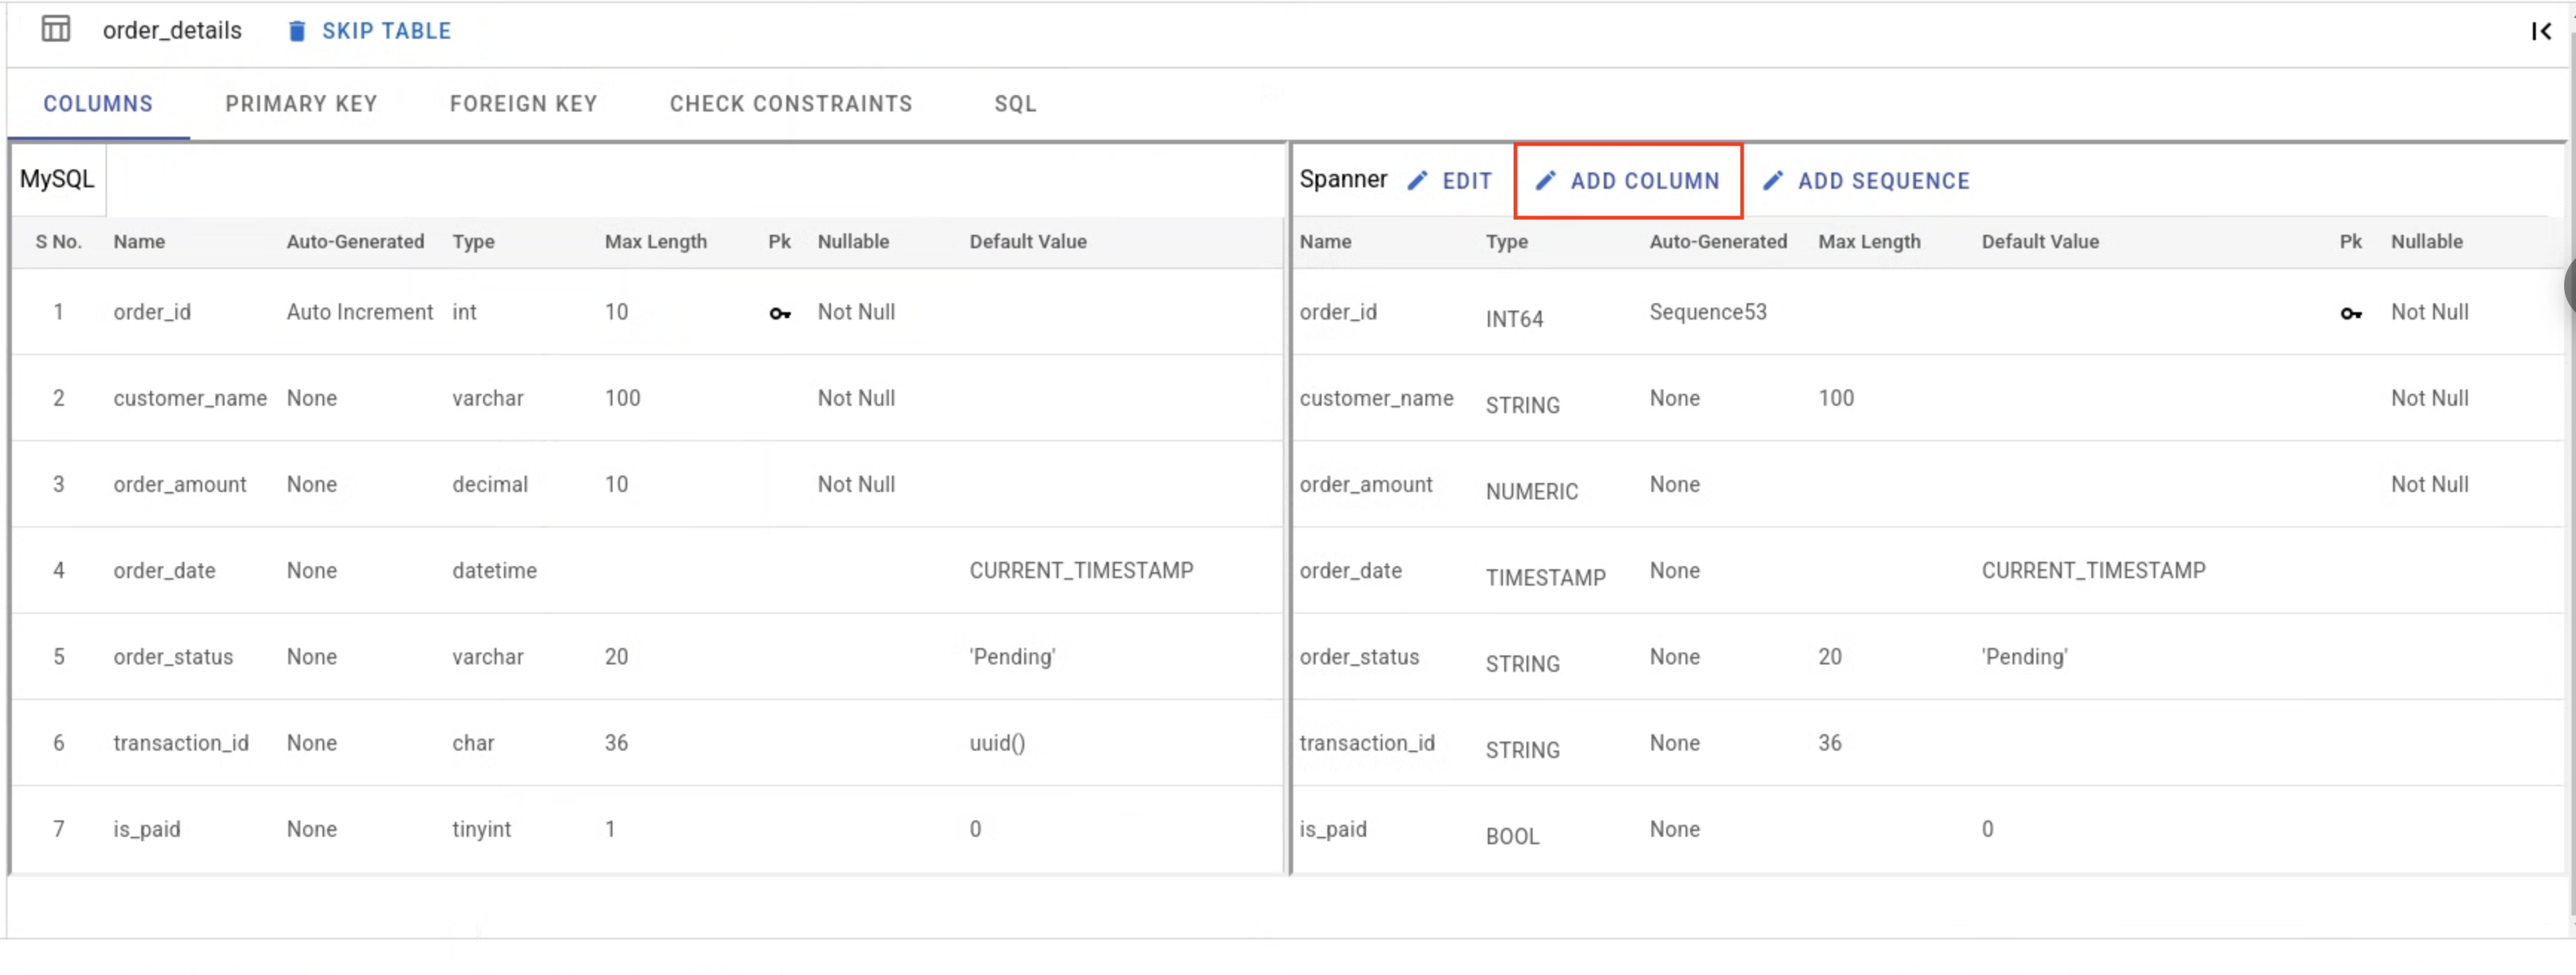

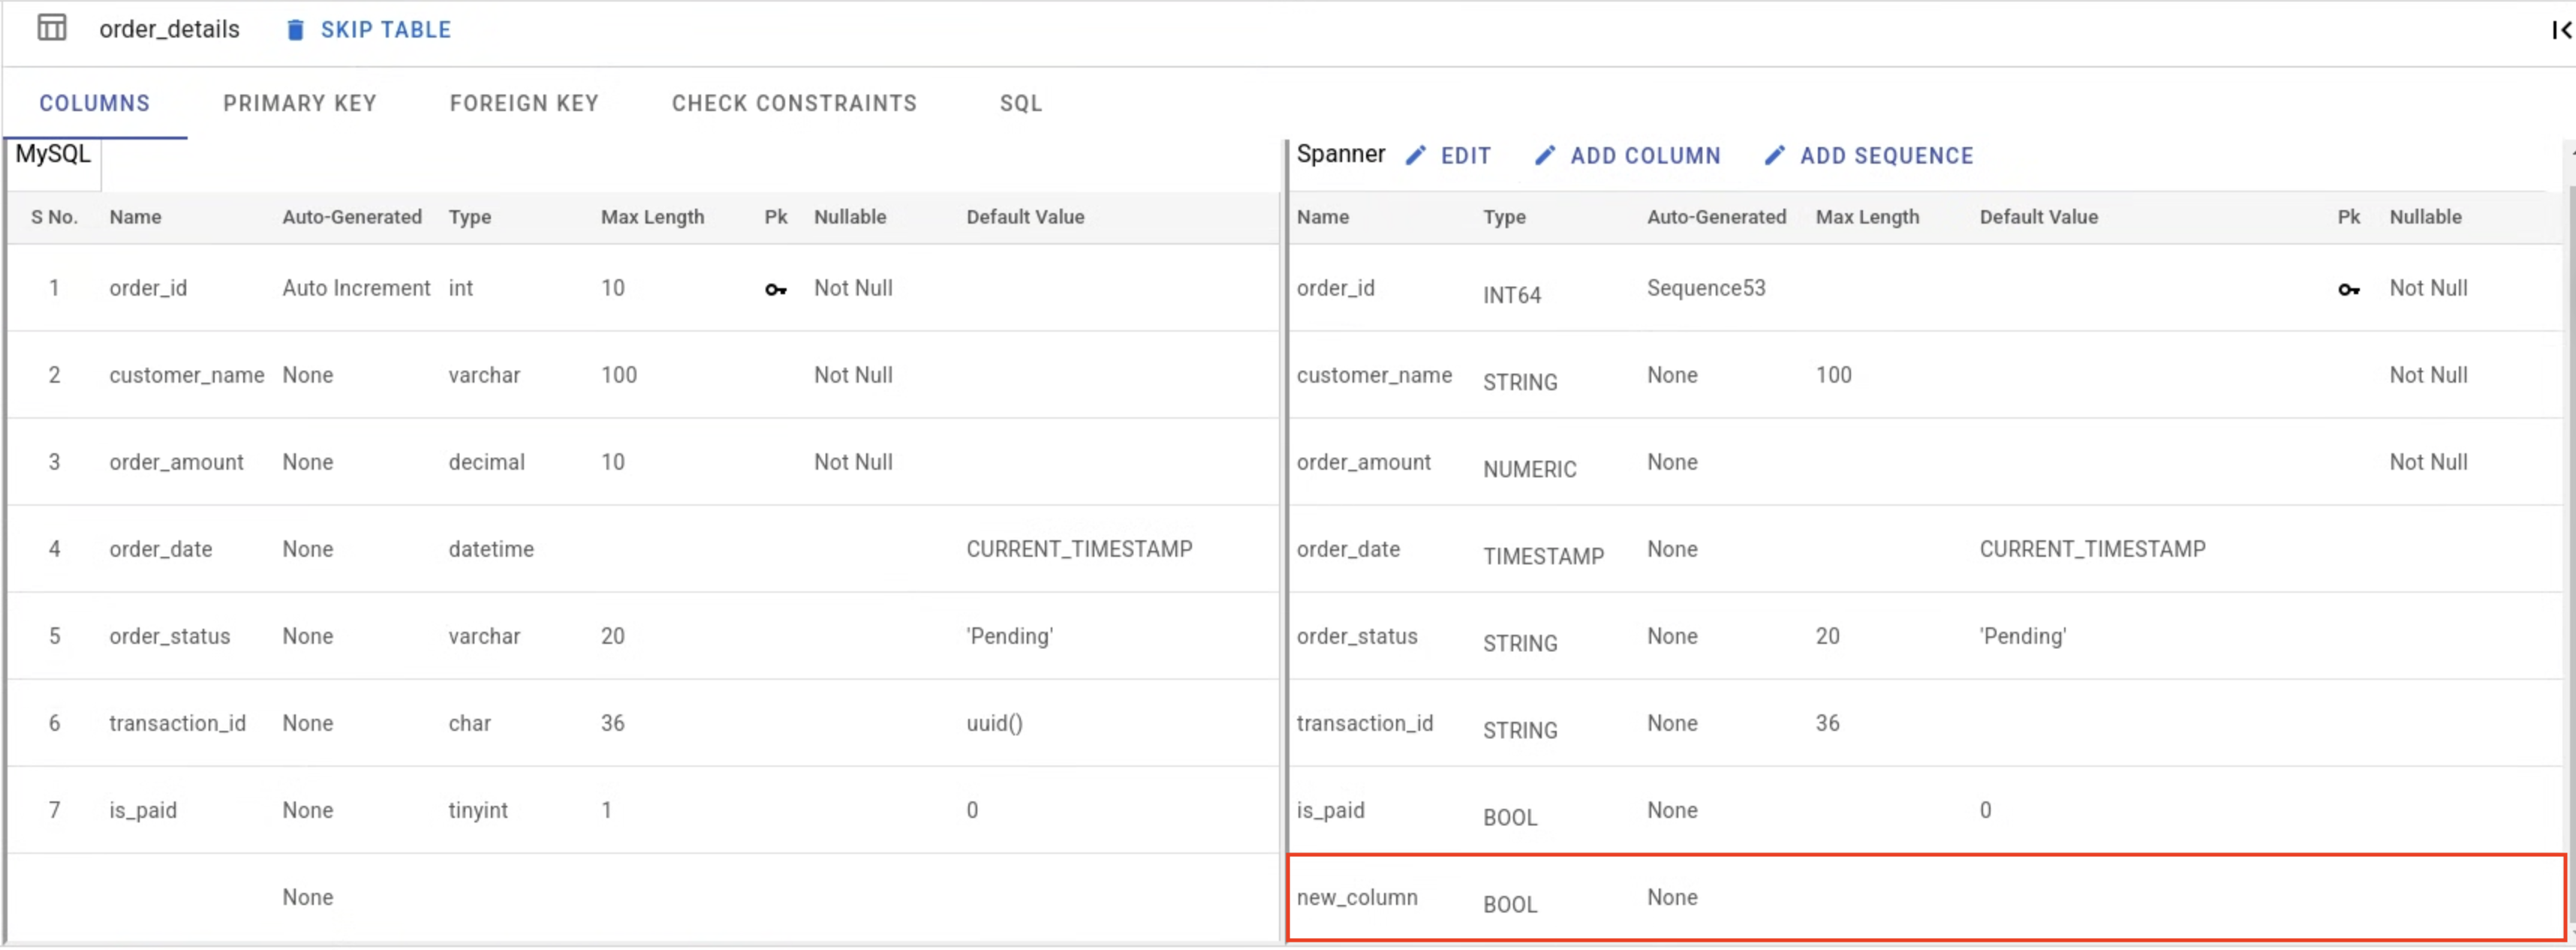
To specify custom transformation logic in the dataflow pipeline to populate these columns, please refer to the Custom Transformation section.
Primary Key
Users can view and edit the primary key of a table from the primary key tab. They can remove/add a column from the primary key or change the order of columns in the primary key. Once these changes are made, the session file is updated and they can also be verified from the SQL tab.

Foreign Key
Users can view and edit the foreign key of a table from the foreign key tab. They can modify the foreign key constraint name or drop the foreign key. Once these changes are made the session file is updated.

Interleave
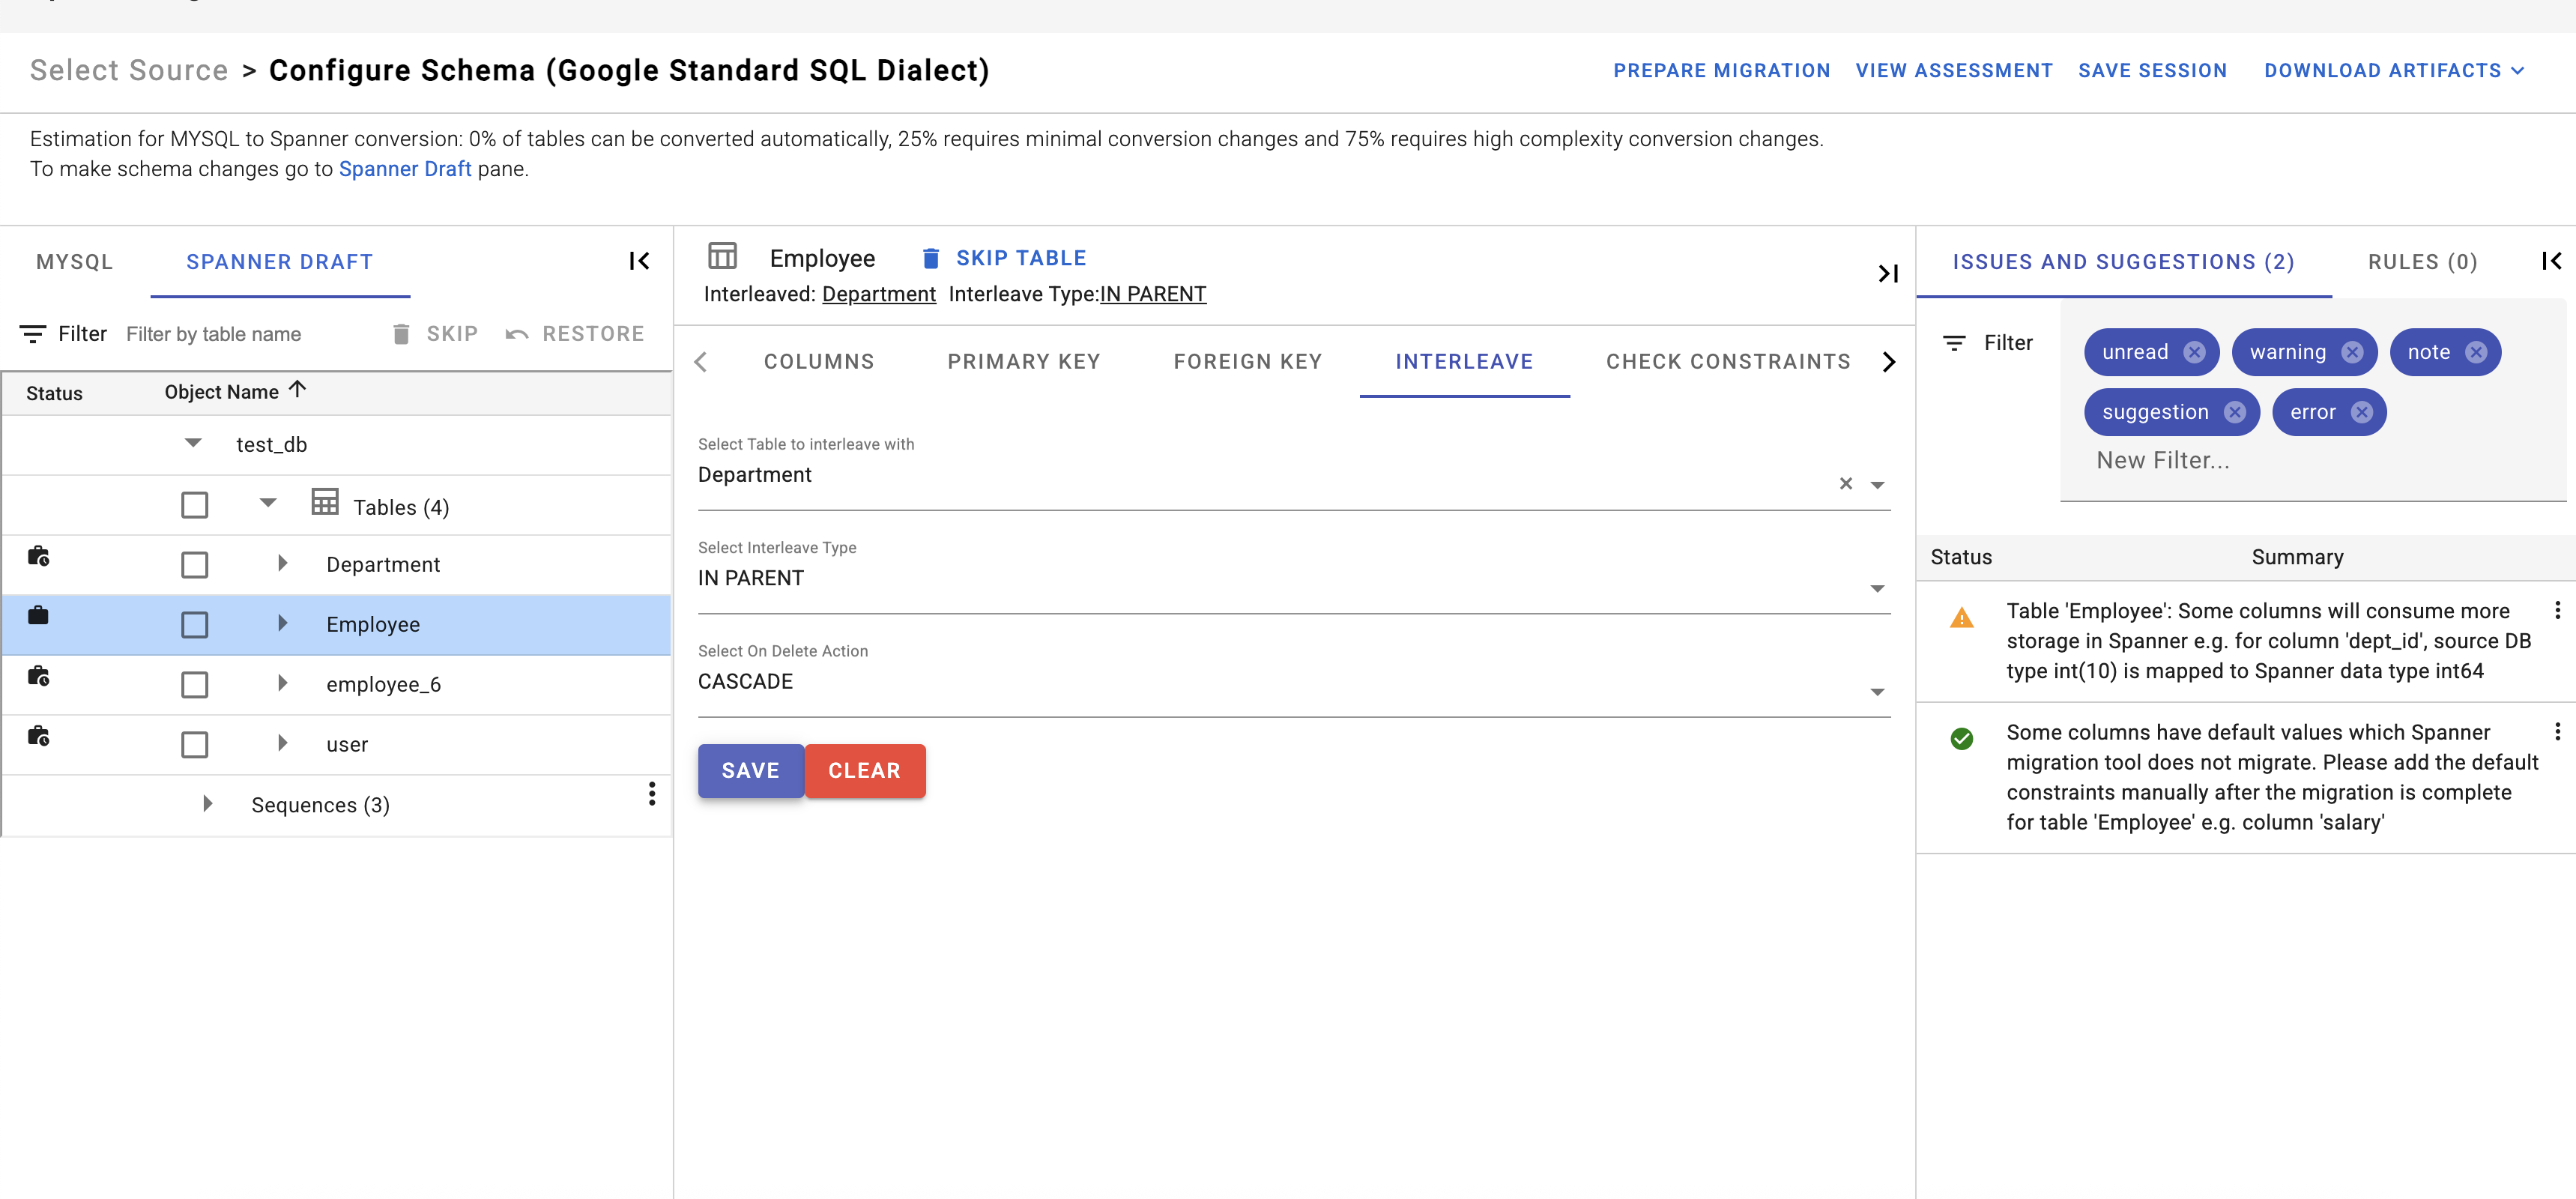
Interleaving physically co-locates child rows with parent rows in storage. Co-location can significantly improve performance.For example, if there is a Customers table and an Invoices table, and the application frequently fetches all the invoices for a customer, users can define Invoices as an interleaved child table of Customers. In doing so, a data locality relationship between two independent tables is declared resulting in significant performance improvement. Spanner Migration Tool provides the option to convert a table into an interleaved table by providing the intended parent table if it fulfills interleave requirements. Once a table is converted into an interleaved table, the UI shows the information of the parent table. Users can also choose to remove this interleaving property. Currently Spanner Migration Tool allows users to choose between INTERLEAVE IN feature that allows child rows to be inserted without parent being present or INTERLEAVE IN PARENT feature which maintains the referential integrity. Users have to choose the ON DELETE action for INTERLEAVE IN PARENT setting. The INTERLEAVE IN feature leads to a faster migration. After the migration is completed, users need to modify the DDL to shift from INTERLEAVE IN to INTERLEAVE IN PARENT so that the check for parent and child rows can be inforced.
Interleaving property needs to be set during the migration and a table cannot be interleaved after migration.
Check Constraints
Users have the ability to view and modify check constraints of a table via the check constraints tab. They can alter the check constraint’s name, condition, and even remove the check constraint entirely. Once these changes are made the session file is updated.
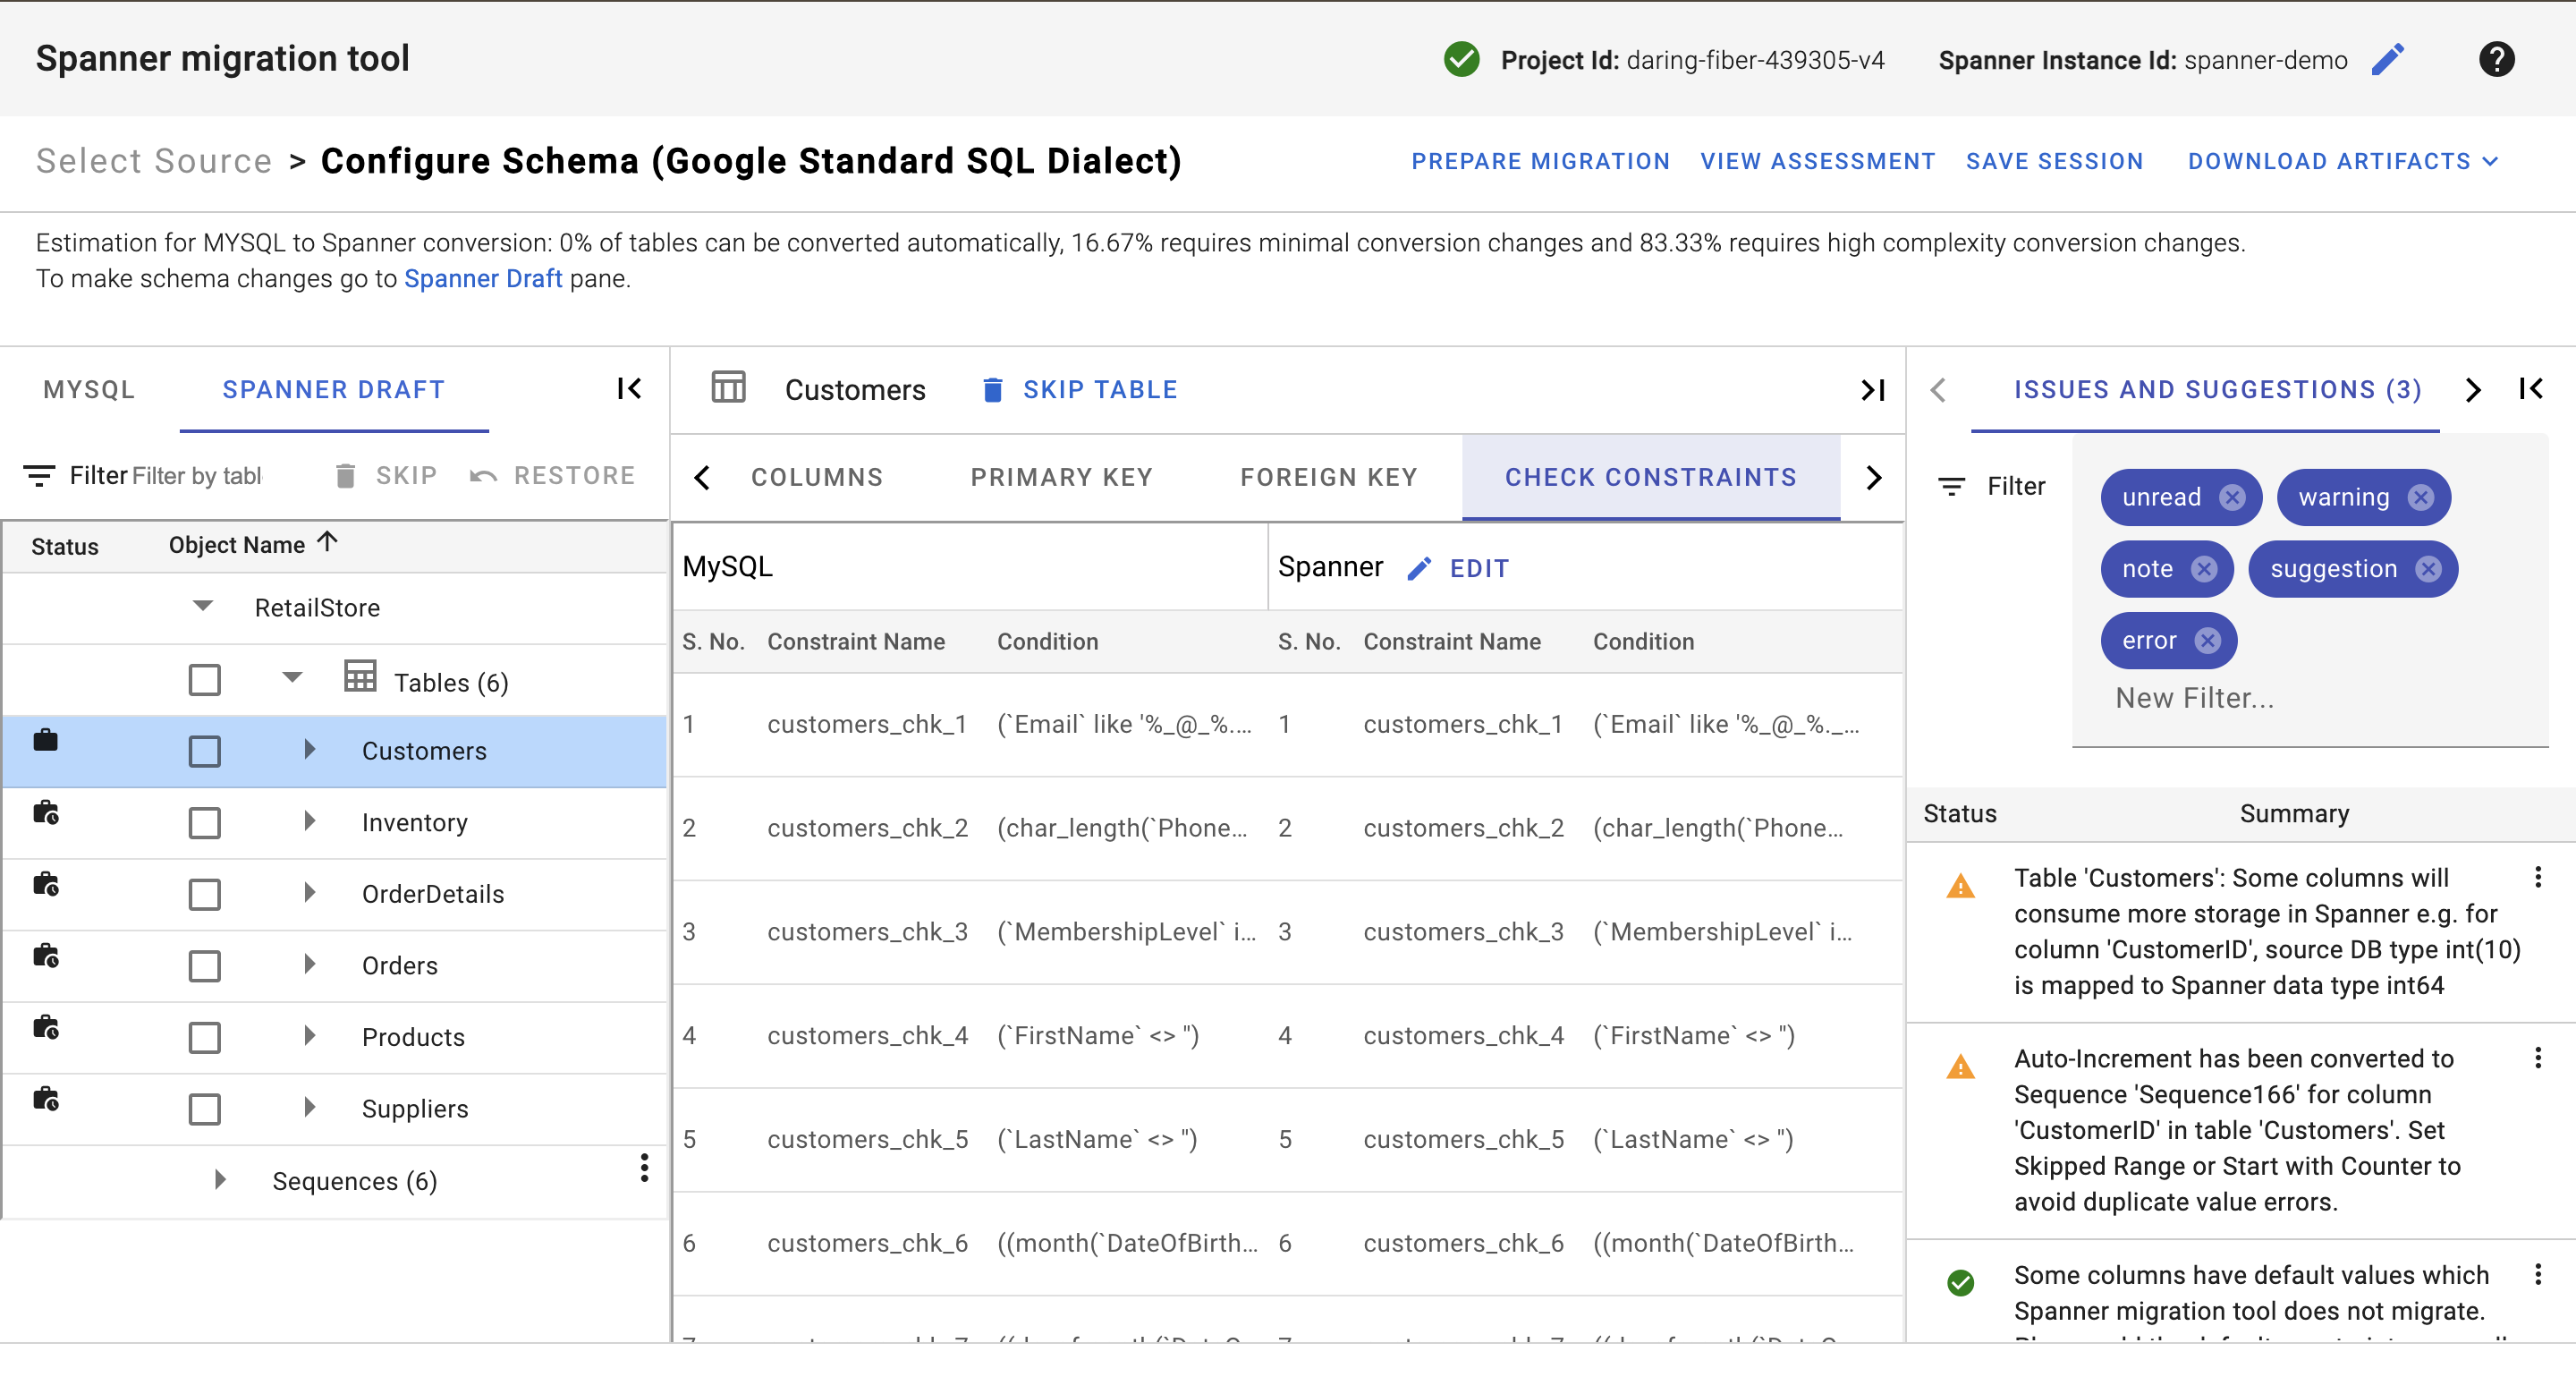
Add or Edit Constraint
Besides modifying the existing check constraint in the Spanner draft mapped from the source database, users can also add new constraints to the selected table.

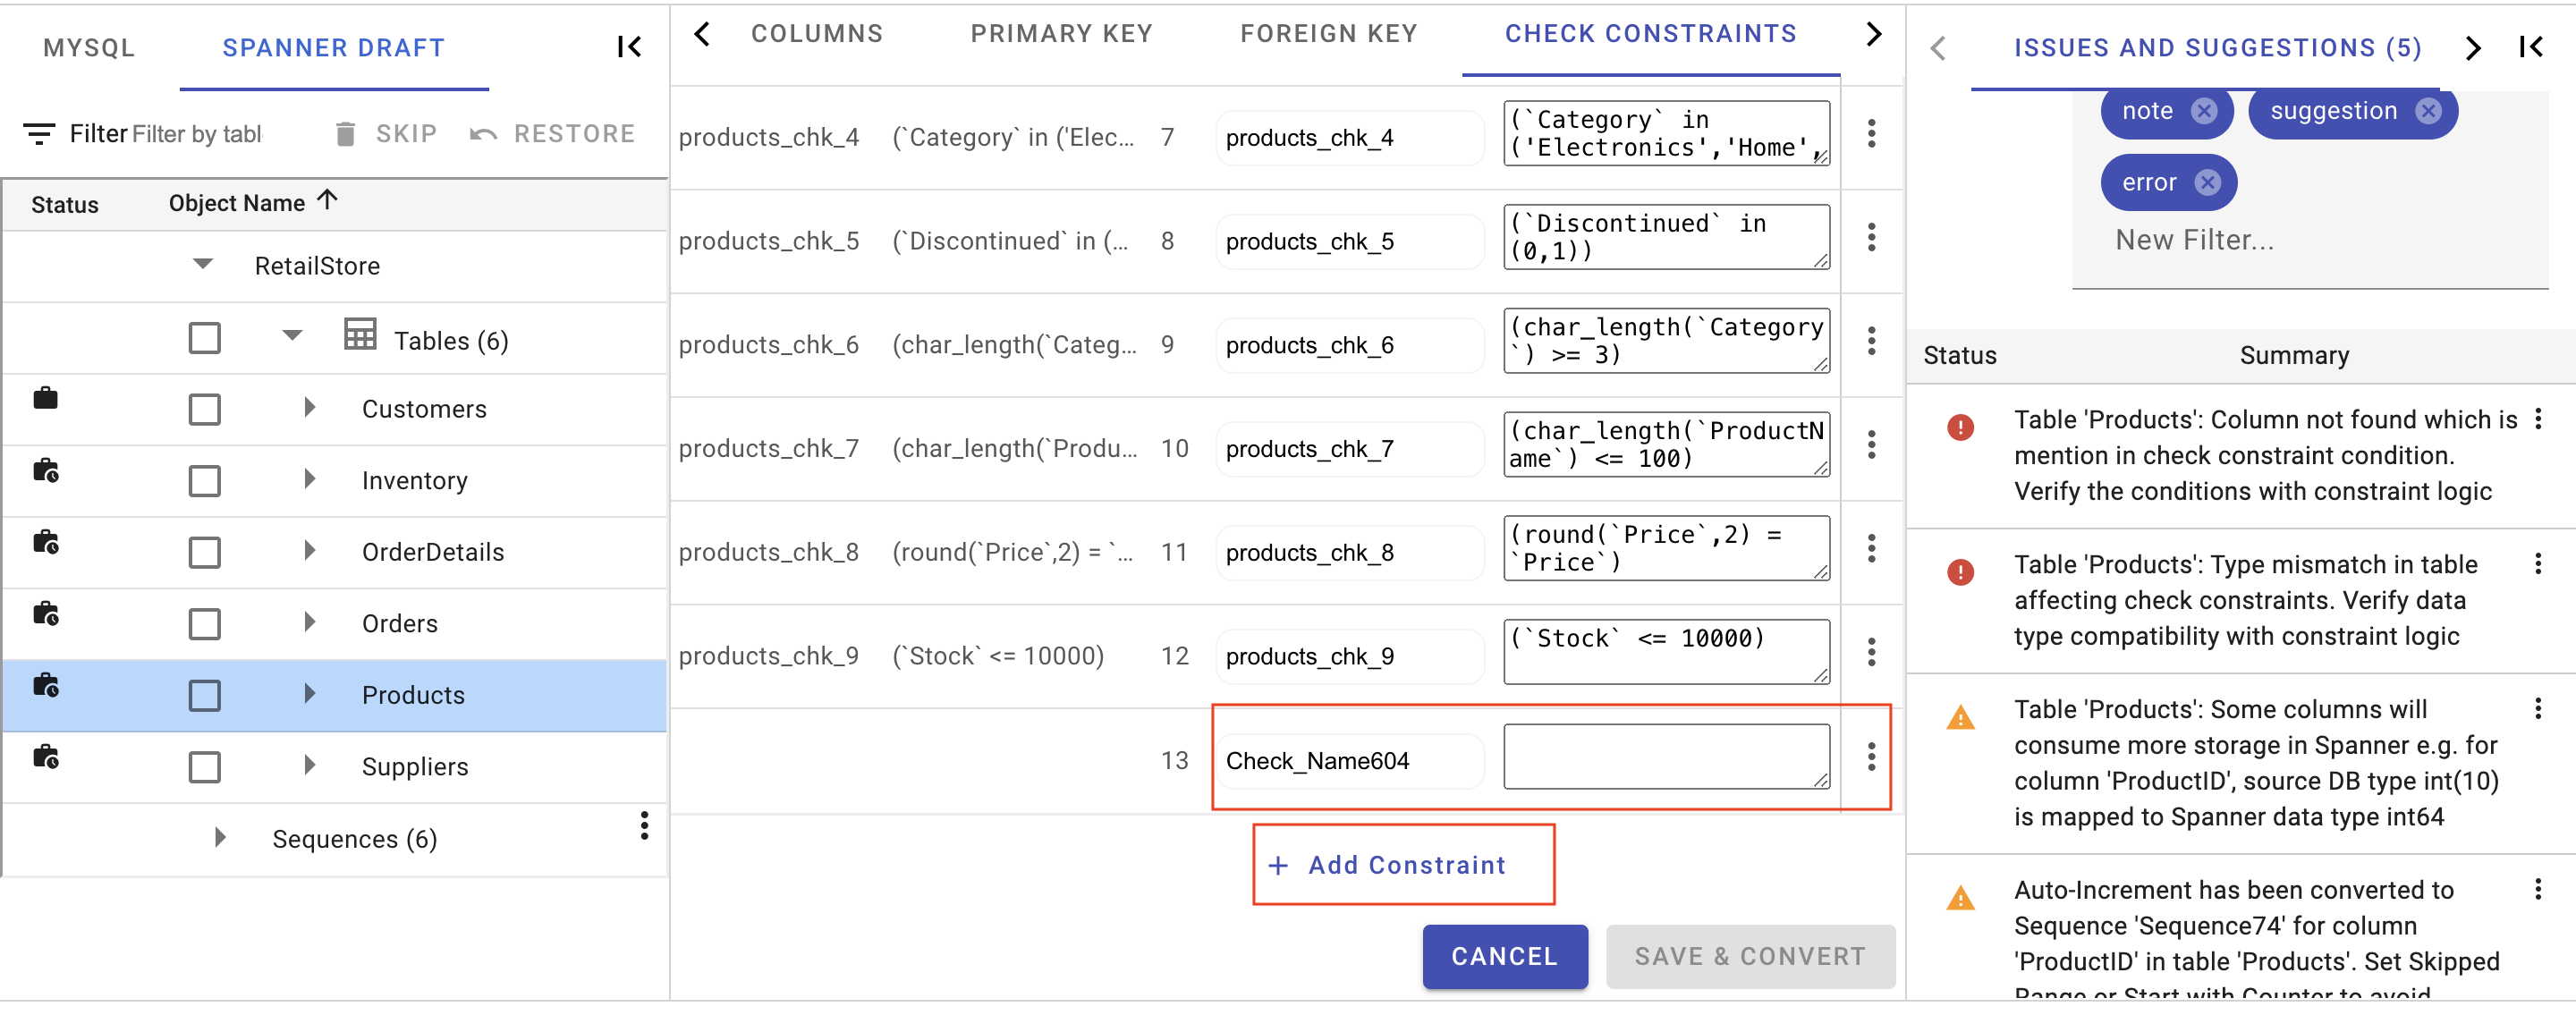
Remove Constraint
In addition to adding check constraints, users can also remove the check constraints in the spanner draft for the selected table.

SQL
Once the user is done with all the schema modifications they can then visit the SQL tab which shows the Spanner DDL for the modified schema.

Drop & Restore Table
Spanner Migration Tool also provides the users with the capability to drop and restore tables from the spanner database. Once the table is dropped, it appears as deleted under the Spanner Draft section and can be restored from there.


Indexes
Spanner Migration Tool provides information on indexes for source and spanner databases. It gives details of columns that are a part of the index along with their sort order. Users can edit the index and modify the order of columns in the index,sort order of the columns, add new columns to the index and remove columns from the index.

Drop & Restore Index
Spanner Migration Tool also provides the users with the capability to drop and restore existing indexes from the spanner database. Once the index is deleted, it appears as deleted under the Spanner Draft section and can be restored from there.
Add Secondary Index
Apart from the existing indexes for the source database, users can also add secondary indexes for any table, if required. In order to add an index for a table, the user needs to select the Add Index option and provide some details mandatory to create an index like index name, columns that are a part of the index and their sort order.


Auto-Generated Columns
Only Supported for source database MySQL
Auto-Generated Columns populate Spanner columns automatically if no value is provided. Currently Spanner Migration Tool support the following techniques for auto-generation:
- UUID function: Generate a UUID (v4) as part of a table’s primary key DEFAULT expression.
- Identity columns: automatically generate integer values without having to manually maintain an underlying sequence. Existing auto-incrementing columns are mapped to Identity columns.
- Bit reverse function: Map existing integer keys using the same logic as a bit-reversed sequence to avoid hotspotting.
Refer to documentation.
UUID
The default recommendation for primary keys in Spanner is to use a Universally Unique Identifier, or UUID. Users can convert existing columns to be filled by UUID by choosing the Edit option in a table and under the Auto-Generated column choosing UUID. 
Identity Columns
Identity columns automatically generate integer values without requiring manual maintenance or management of an underlying sequence by users.
By default, the Spanner Migration Tool maps auto-incrementing columns from the source database to Identity columns in Spanner, without setting any SKIP RANGE or START COUNTER WITH values. In order to avoid duplicates, it is recommended to set either a SKIP RANGE or a START COUNTER WITH value for all auto-incrementing columns that will be migrated.
See documentation for more details on Identity columns.
Sequences
Spanner offers a SEQUENCE object that generates unique integers as part of a primary key DEFAULT expression. However, unlike a monotonic sequence, the values generated by a Spanner sequence are distributed uniformly and thus won’t hotspot at scale.
Create a new Sequence
In order to add a sequence, the user needs to select the Add Sequence option and provide some details mandatory to create a sequence like sequence name and sequence type. An existing sequence can also be modified using the Edit button.
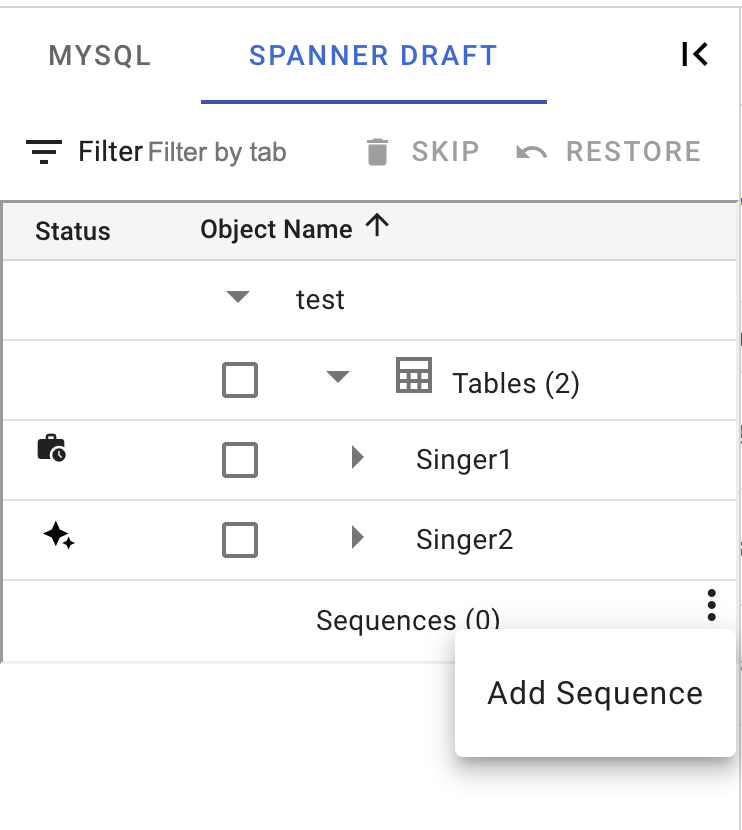

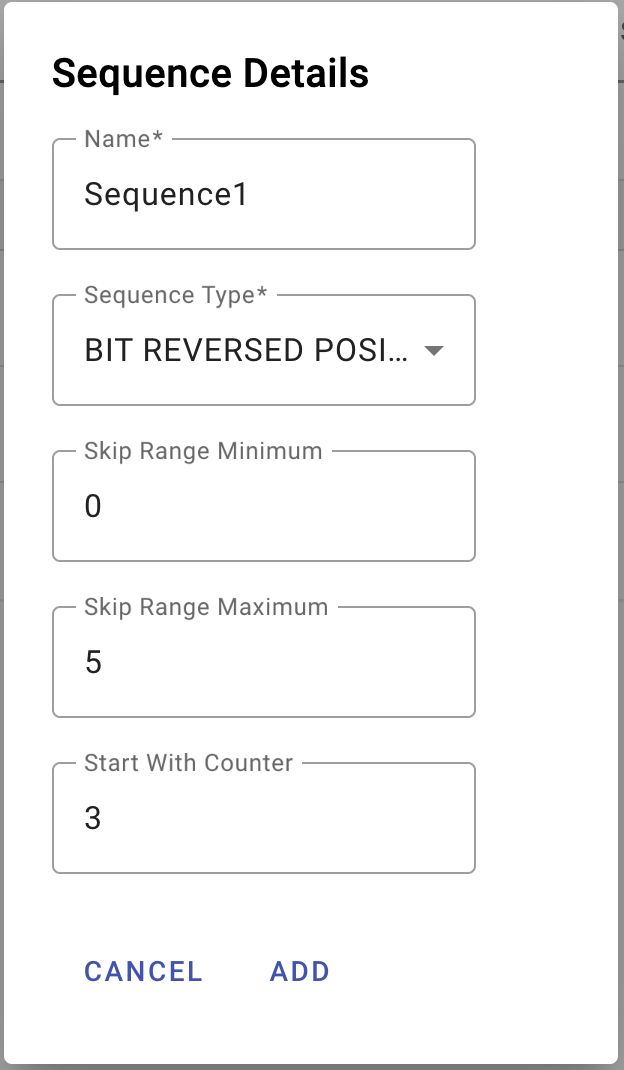
To assign a sequence to a column, users need to select the Edit option in a table and under the Auto-Generated column choose a Sequence.

Drop a Sequence
Users can drop a sequence by selecting the sequence and clicking on DROP SEQUENCE. Once a sequence is dropped, all columns that used the sequence for auto-generated will have their auto-generation policy set to none.
