Individual Table migrations
Spanner migration tool provides the ability to migrate a subset of tables from the source database to Spanner. This can help in a number of ways such as:
- Running a POC on a sample set of tables.
- Breaking up a monolithic database schema into multiple logical databases on Spanner.
- Avoid migration of redundant/deprecated tables from source to Spanner.
Spanner migration tool supports skipping/restoring both, each table individually, and several tables in bulk. In the section below, we will look at how this can be configured using the Spanner migration tool UI.
Table of contents
Skipping/restoring individual tables

The schema conversion workspace lists all the tables read by Spanner migration tool from the source database. In order to skip/restore a table individually, do the following:
- Click on the table to be skipped/restored on the left pane.
- In the middle pane, next to the name of the table, click on
SKIP TABLEorRESTORE TABLEbutton. - Enter the name of the table in the confirmation dialog.
- Click confirm to skip/restore the table.

Skipping/restoring tables in bulk

The schema conversion workspace lists all the tables read by Spanner migration tool from the source database. In order to skip/restore multiple tables at once, do the following:
- Navigate to
Spanner drafton the left-pane. - Click on the check-boxes of the tables to be skipped/restored.
- Once all the candidate tables have been selected, click on the
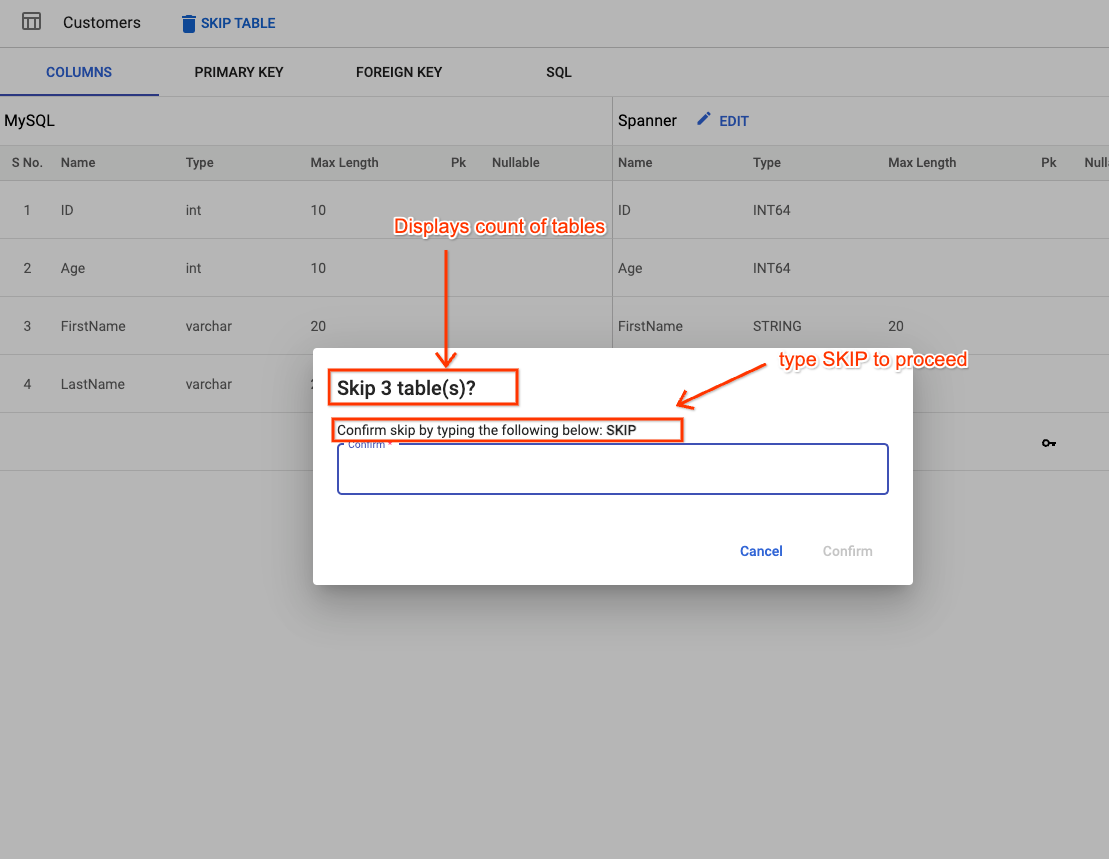
SKIPorRESTOREbutton placed at the top of the left pane.SKIPorRESTOREbuttons will be enabled on the basis of the current state of the selected table. For example, if you selected three unskipped tables, only theSKIPbutton would be enabled. - A confirmation dialog will show the number of tables to be skipped/restored. Enter
SKIPorRESTOREto confirm as per the selected operation. Note that if you have selected a combination of skipped and restored tables, state change will only be applied to qualifying tables. - Click confirm to skip/restore the selected tables.