Deployment of the custom nodes, input files and workflows
Note: If you are running ComfyUI on GKE via ComfyUI on GKE guide, you can skip this guide and directly move to the User Guide.
ComfyUI custom nodes for Google Generative Media Models
ComfyUI custom node is an user-created extension that adds new functionality to the software's visual, node-based workflow.
Think of it like a plugin or a module. While ComfyUI comes with many built-in nodes, custom nodes allow users to implement new features, integrate external services, or combine existing functions into a single, more efficient node.
A custom node is typically a Python class that defines its inputs, outputs, and the function it performs. It can be as simple as a node that combines multiple images or as complex as a node that connects to an external API (like the Google Gemini API for image captioning) to process an input and return a new result.
In this guide we will use Google Generative Media custom codes named comfyui-google-genmedia-custom-nodes
Download Google Generative Media ComfyUI and other custom nodes
The demo contains workflows that uses Google Generative Media custom nodes. In addition to that, some of the workflows use custom nodes provided by ComfyUI-VideoHelperSuite for example to upload an input file from a given path. In this section, you will download the required custom nodes.
If you are running ComfyUI locally, perform the following steps to install the custom nodes
-
Download these custom nodes in one of the following ways:
-
Using the ComfyUI Manager
- Go to ComfyUI Manager --> Custom Node Manager --> search for
comfyui-google-genmedia-custom-nodes. Click Install. - Go to ComfyUI Manager --> Custom Node Manager --> search for
ComfyUI-VideoHelperSuite. Click Install.
- Go to ComfyUI Manager --> Custom Node Manager --> search for
-
Manual installation using git
-
Open the terminal on the machine that is running ComfyUI and change to the directory where ComfyUI is running from.
-
Change to the custom_nodes folder.
-
Make sure git is installed on your machine.
If you get the error
command not found, install git based on your machine's operating system. -
Clone the Google Generative Media custom node repository in the custom_nodes folder:
-
Clone the VHSHelper Suite custom node repository in the custom_nodes folder:
-
Install python packages:
-
If you are running ComfyUI in a python virtual environment, activate it before installing the dependencies.
-
Install python packages
-
-
-
Authentication to Google Cloud
Authenticate local ComfyUI instance with Google Cloud user
If you want to make the API calls to Google models with your Google Cloud user.
- On the machine where you are running ComfyUI, install gcloud cli using the documentation https://docs.cloud.google.com/sdk/docs/install
- Open the terminal.
-
Authenticate with the following command. Enter your Google Cloud credentials when prompted:
Authenticate local ComfyUI with Google Cloud Service Account
If you do not want to make the API calls to Google models with your Google Cloud user and want to use a service account instead.
- On the machine where you are running ComfyUI, open the terminal.
- Install gcloud cli using the documentation https://docs.cloud.google.com/sdk/docs/install
-
Authenticate with the following command. Enter your Google Cloud user credentials when prompted:
-
Set shell variables
export PROJECT_ID="<YOUR_PROJECT_ID>" export SERVICE_ACCOUNT_ID="<YOUR_SERVICE_ACCOUNT_ID>" export USER_EMAIL=`gcloud auth list --filter=status:ACTIVE --format="value(account)"` Replace <YOUR_PROJECT_ID> with the GCP project id you plan to use Replace <YOUR_SERVICE_ACCOUNT_ID> with the name of the service account you will use to access Google Cloud with ComfyUI. It will be created in the next step. -
Set Google Cloud project.
-
Create a new service account:
-
Grant permissions to the service account:
Note: You need
resourcemanager.projects.setIamPolicypermissions in order to run the following step. This permissions is included inowner,resourcemanager.projectIamAdminandiam.securityAdminroles.gcloud projects add-iam-policy-binding $PROJECT_ID \ --member="serviceAccount:${SERVICE_ACCOUNT_ID}@${PROJECT_ID}.iam.gserviceaccount.com" \ --role="roles/storage.objectUser" --condition=None gcloud projects add-iam-policy-binding $PROJECT_ID \ --member="serviceAccount:${SERVICE_ACCOUNT_ID}@${PROJECT_ID}.iam.gserviceaccount.com" \ --role="roles/aiplatform.user" --condition=None -
Grant the Service Account Token Creator role to your user on the service account. This role lets your user account to impersonate the Service Account created in previous steps.
-
Now, set yourself to impersonate the service account.
Copy the input images and workflows required for the demo
The input images and workflows are provided with this repo in the input and
workflows directories respectively. You need to copy these in your ComfyUI
instance in order to be able to run through this guide.
- Open the terminal on the machine running ComfyUI.
-
Clone the git repository
-
Set shell environment variables:
export YOUR_COMFYUI_INPUT_PATH="<YOUR_COMFYUI_INPUT_PATH>"
export YOUR_COMFYUI_WORKFLOW_PATH="<YOUR_COMFYUI_WORKFLOW_PATH>"
Note: Replace
with the input folder of your ComfyUI instance e.g ComfyUI/input. Replace with the workflow folder of your ComfyUI instance e.g ComfyUI/user/default/workflows -
Copy the input files
-
Verify that the input files have been copied over
You will see the following files. Note, that the path to the workflow directories could be different but you should see the same input files
/XXXXXX/ComfyUI/input/funday/casting/casting_reference_to_image.png /XXXXXX/ComfyUI/input/funday/character_continuity/character_continuity_deflation.png /XXXXXX/ComfyUI/input/funday/character_continuity/character_continuity_scene1.png /XXXXXX/ComfyUI/input/funday/character_continuity/character_continuity_single_character_env.png /XXXXXX/ComfyUI/input/funday/character_continuity/character_continuity_single_character_prop.png /XXXXXX/ComfyUI/input/funday/environment_and_props/environment_and_props_reference_to_image.png /XXXXXX/ComfyUI/input/funday/shot_production/shot_production1_cast.png /XXXXXX/ComfyUI/input/funday/shot_production/shot_production1_environment.png /XXXXXX/ComfyUI/input/funday/shot_production/shot_production1_prop.png /XXXXXX/ComfyUI/input/funday/shot_production/shot_production2_cast.png /XXXXXX/ComfyUI/input/funday/shot_production/shot_production2_environment.png /XXXXXX/ComfyUI/input/funday/shot_production/shot_production2_prop.png /XXXXXX/ComfyUI/input/funday/shot_production/shot_production3_1.png /XXXXXX/ComfyUI/input/funday/shot_production/shot_production3_2.png /XXXXXX/ComfyUI/input/funday/storyboard/storyboard_cast1.png /XXXXXX/ComfyUI/input/funday/storyboard/storyboard_cast2.png /XXXXXX/ComfyUI/input/funday/storyboard/storyboard_environment1.png /XXXXXX/ComfyUI/input/funday/storyboard/storyboard_environment2.png /XXXXXX/ComfyUI/input/funday/storyboard/storyboard_final.png /XXXXXX/ComfyUI/input/funday/storyboard/storyboard_prop1.png /XXXXXX/ComfyUI/input/funday/storyboard/storyboard_prop2.png -
Copy the workflow files
-
Verify that the workflow files have been copied over
ls -1 "${YOUR_COMFYUI_WORKFLOW_PATH}"/{casting,character_continuity,environment_and_props,storyboard,shot_production}/*You will see the following files. Note, that the path to the workflow directories could be different but you should see the same json files.
/XXXXXX/ComfyUI/user/default/workflows/casting/casting_reference_to_image.json
/XXXXXX/ComfyUI/user/default/workflows/casting/casting_text_to_image.json
/XXXXXX/ComfyUI/user/default/workflows/character_continuity/character_continuity_deflation.json
/XXXXXX/ComfyUI/user/default/workflows/character_continuity/character_continuity_scene1.json
/XXXXXX/ComfyUI/user/default/workflows/environment_and_props/environment_and_props_reference_to_image.json
/XXXXXX/ComfyUI/user/default/workflows/environment_and_props/environment_and_props_text_to_image.json
/XXXXXX/ComfyUI/user/default/workflows/shot_production/shot_production1.json
/XXXXXX/ComfyUI/user/default/workflows/shot_production/shot_production2.json
/XXXXXX/ComfyUI/user/default/workflows/shot_production/shot_production3.json
/XXXXXX/ComfyUI/user/default/workflows/storyboard/reference_to_image_scene1.son
/XXXXXX/ComfyUI/user/default/workflows/storyboard/reference_to_image_scene2.json
Validate that the custom nodes are downloaded successfully
-
Re-start ComfyUI via ComfyUI manager or manually. Verify there are no failures in the logs and the log says that comfyui-google-genmedia-custom-nodes custom nodes have been loaded successfully, similar to the following message:
-
Right click on ComfyUI, Click the 'Add node' menu and you should see a category named
Google AIwith custom nodes for Google’s genmedia models as shown in the image below.
Test a node to verify the connectivity with your GCP project
- Open ComfyUI and right click on ComfyUI screen, follow the menu path by
clicking
Add node>Google AI>GeminiFLashImage>Gemini 3.1 Flash Image (🍌) - This will add a
Gemini 3.1 FLash Image(Nano Bananan) node on the ComfyUI workflow screen. Enter your GCP project id in thegcp_project_idinput field of the node and leave theregioninput as "global" - Write a prompt in the
promptinput field of the node to generate an image. - Add your GCP project id and region to the node's respective input fields.
- Right click on the ComfyUI screen and follow the menu path by clicking
Add node>images>Preview Image - This will add a
Preview Imagenode on the ComfyUI screen. - Now Connect the output of
Gemini 3.1 FLash Imagenode to the input ofPreview Imagenode. You should see something this the following imge: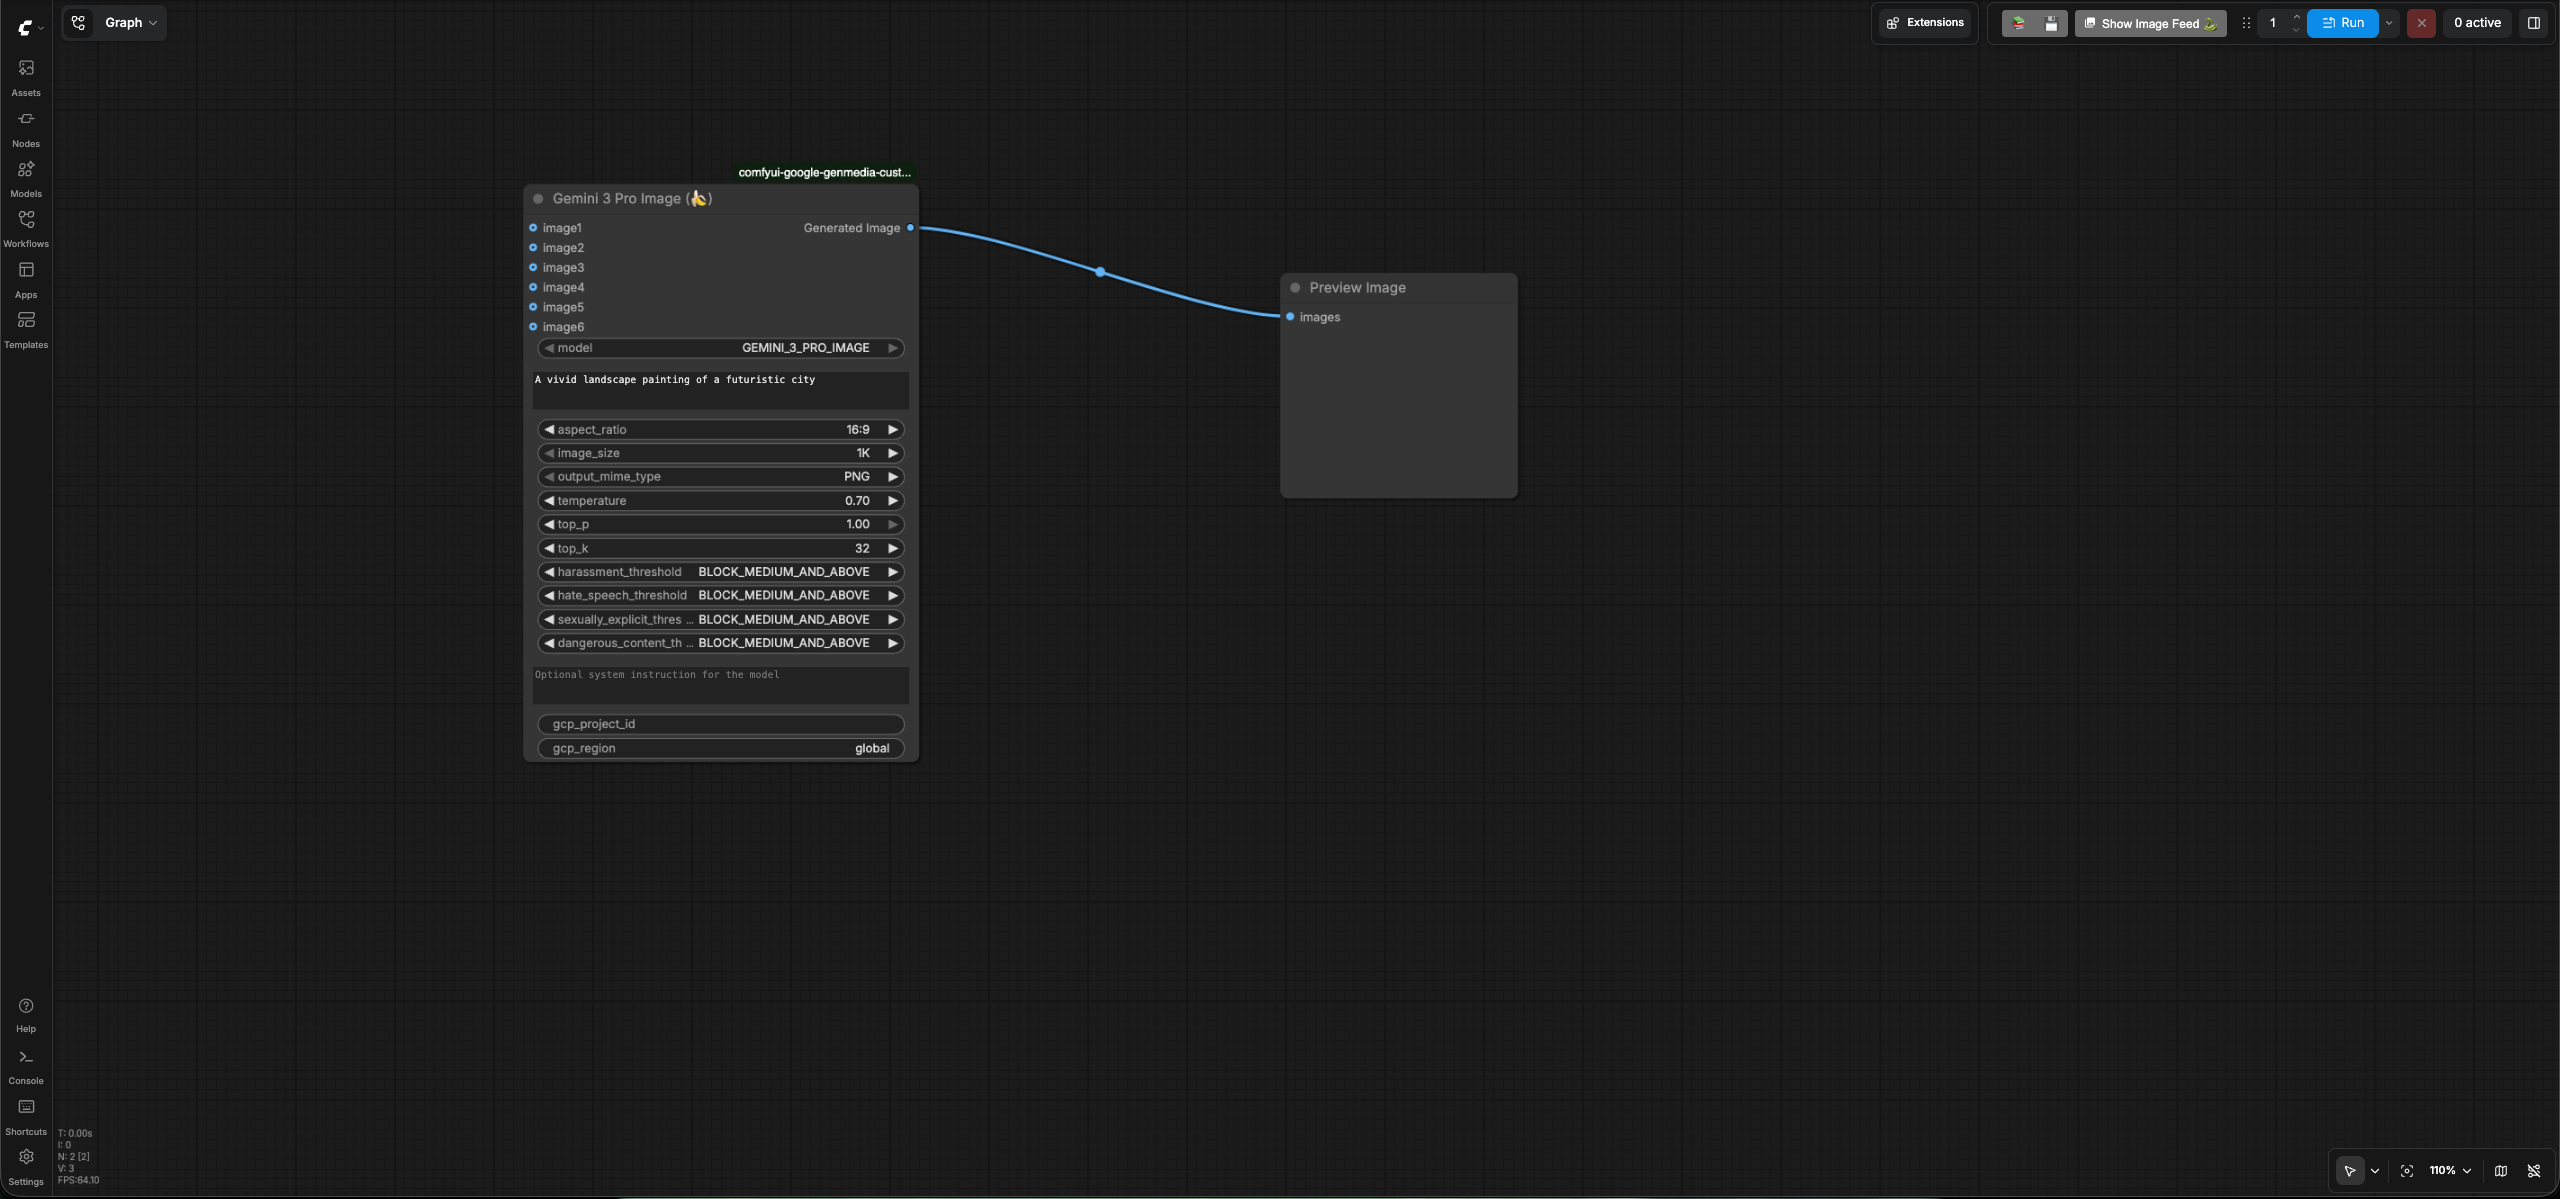
- Click the
Runbutton on ComfyUI to run the workflow. It should generate an image and display it on thePreview Imagenode.
Note: You will need to pass a GCP project id and GCP region as input
parameters to every custom node that is a part of
google-comfyui-genmedia-custom-nodes suite.
Troubleshooting
- If you see failures while testing a node, an error message will be displayed showing why the request failed.
- If the error message displayed is not helpful, check the logs to see the errors.
- If you are running the latest version of ComfyUI, click the
Consolemenu on the bottom left of ComfyUI screen to see the logs. -
Look for API errors. An example of a common error is
RuntimeError: Image generation API error: The project ID either doesn't exist or you don't have permissions to access it.To fix it, verify that you are passing the correct GCP Project Id and you have permission to access it.